Installation
You can do it in two ways:
FTP Upload
- Download the "All files & documentation" from your Themeforest account, "Downloads" section
- Unzip the "main-newave.zip" file
- Select the "newave-theme" folder which represents the Wordpress theme folder. It's important to extract this folder and not the main archive!
- Open up your FTP manager and connect to your hosting
- Browse to wp-content/themes
- Upload the "newave-theme" folder mentioned in the third step above
- Log Into WordPress and go to Appearance » Themes
- Find Newave and click
Wordpress Upload
- Download the "Installable WordPress file only" from your Themeforest account, "Downloads" section
- Navigate to Appearance » Add New Themes » Upload
- Select the downloaded theme file "newave-theme.zip"
- Hit button and the theme will be uploaded and installed
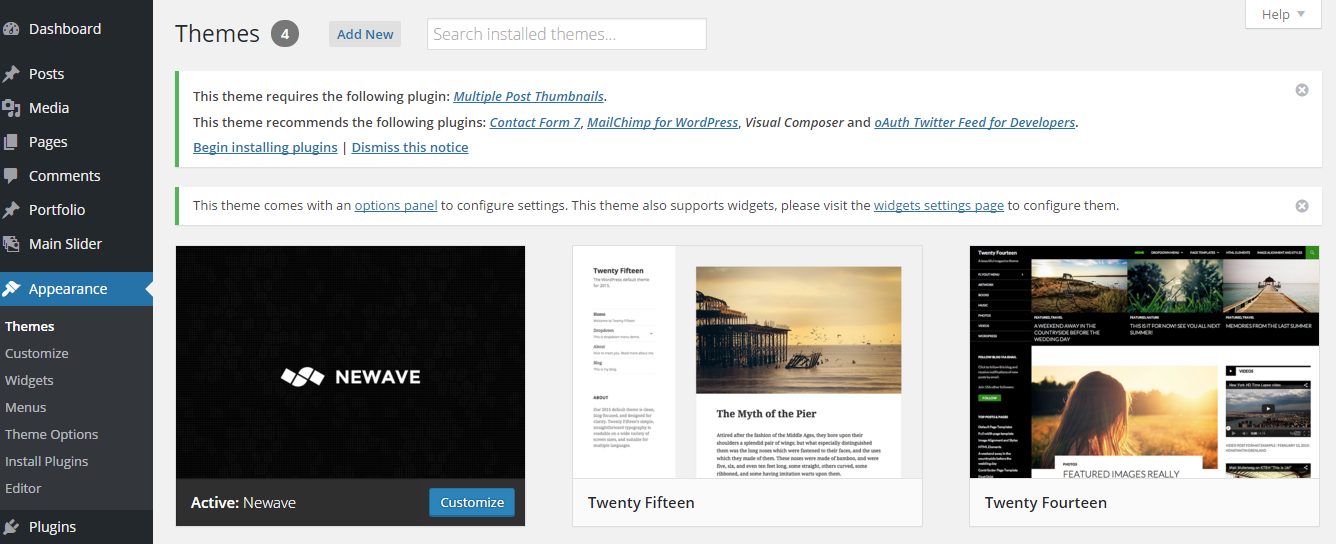
Once the theme is uploaded, you need to activate it. Go to Appearance » Themes and activate Newave theme.
Plugins Installation
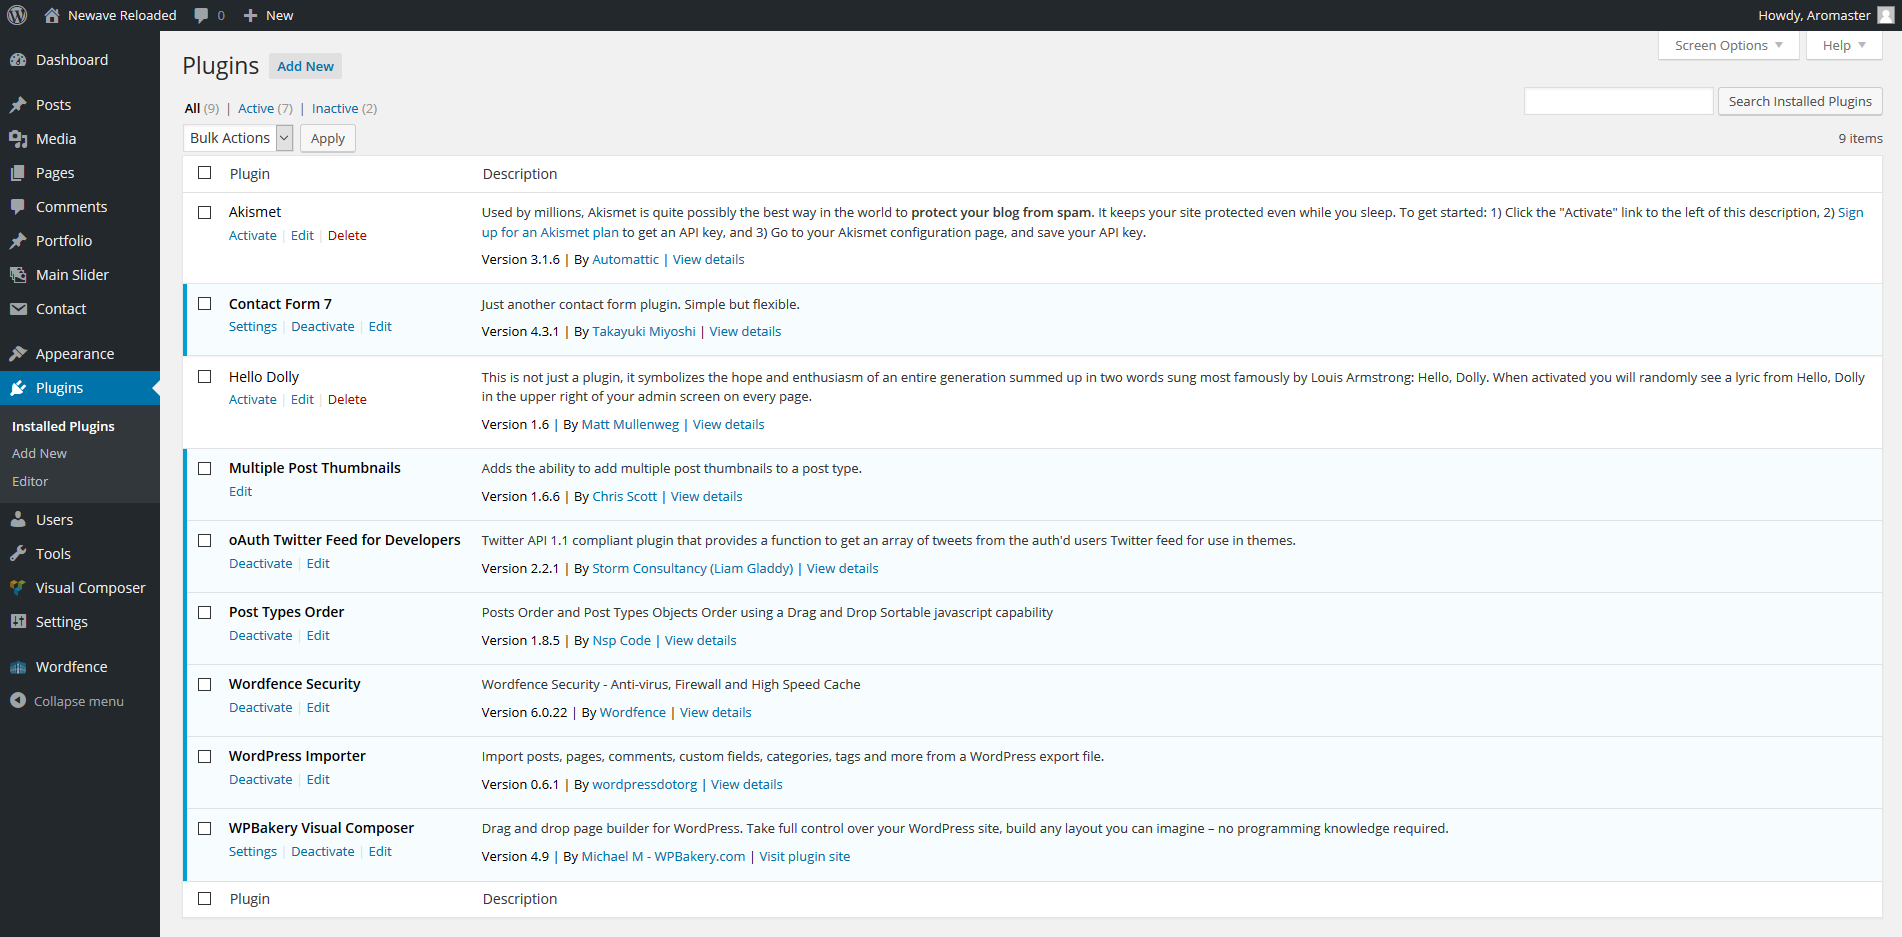
If installation was successful, you'll see a notice about required plugins for Newave, to proceed click "Begin installing plugins".
You'll see a list of plugins, select them all and choose Install and then hit button. If everything will go OK, you should see theme in Plugins » Installed Plugins list in wp-admin and you should activate all new plugins.
Activating Theme Options
After activating the theme, you will notice under Appearance menu new submenu Theme Options. You'll find there Theme Options Panel, from where you can do a lot of cool stuff. Every section of Theme Options Panel will be described later.
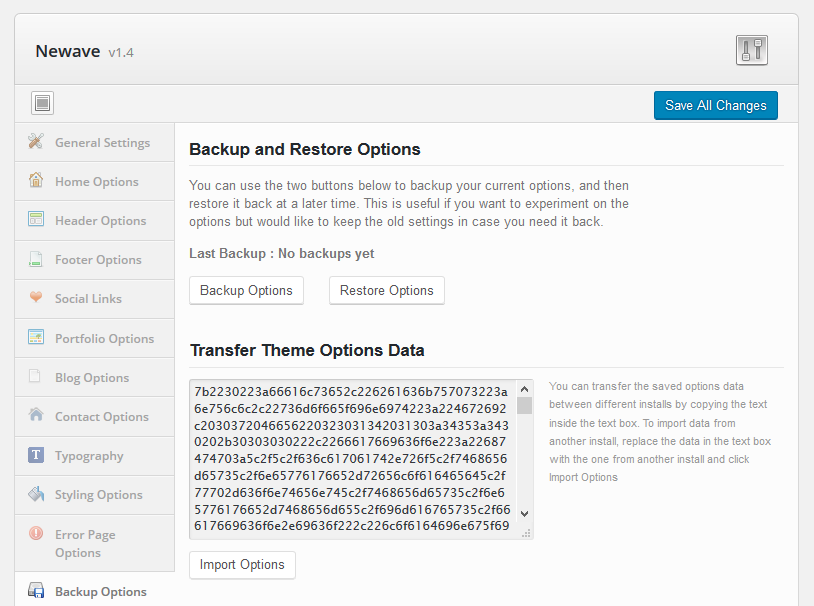
If you want to have the same theme options as Live Preview, go to theme package folder, demos folder, select one of the demo folders you wish to import the data from and open the options file ( theme_options_demo.txt )
Select and copy the file content. After that go to Appearance » Theme Options » Backup Options and paste it to Transfer Theme Options Data.
Press and afterwards press
Importing Demo Content
If you want to have the same content on your website as Live Preview of Newave theme, you'll need to import demo content.
To do that please go to Tools » Import » WordPress, install wordpress importer plugin if necessary and go to main theme package folder, demos folder, select one of the demo folders you wish to import the data from and open the import file ( import.xml ) and proceed importing the file.
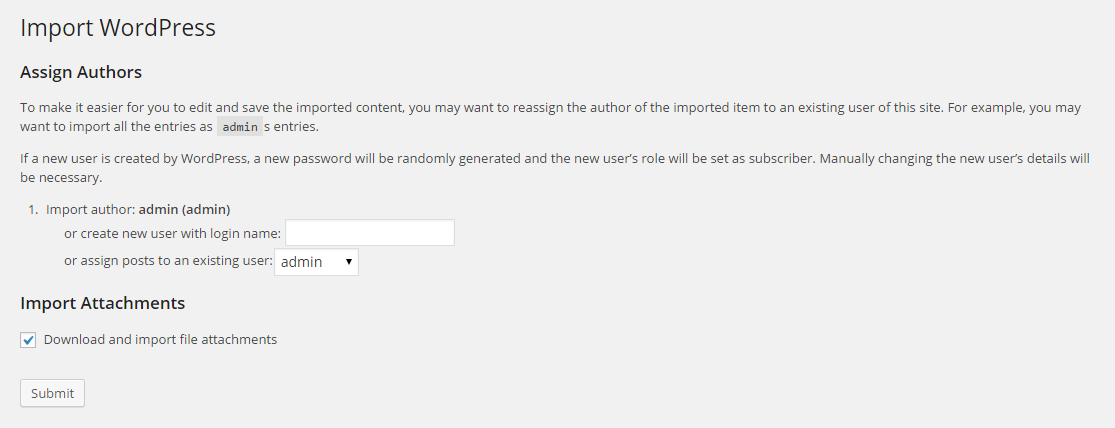
Please make sure you check Download and import file attachments before you click
After the content was succesfully imported, you may need to setup the Main menu.
All photos included with import file are blank since they are used only for demo and we do not have distribution rights.
Setting up the front page
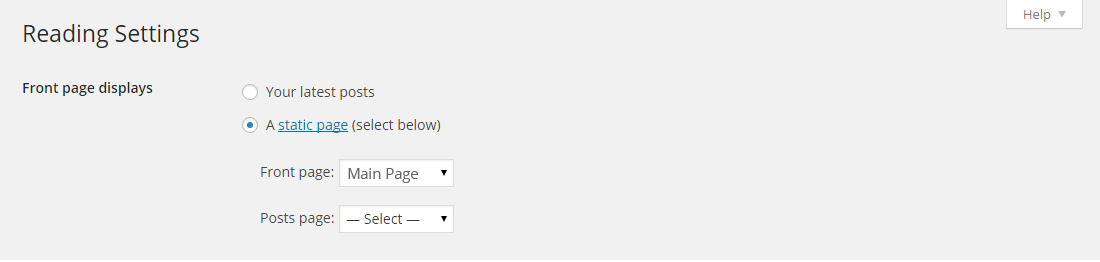
Go to Settings » Reading, and in the Front page displays choose A static page, then select Main Page page.
Click
Main Page is the one page template.
Setting up the Main menu
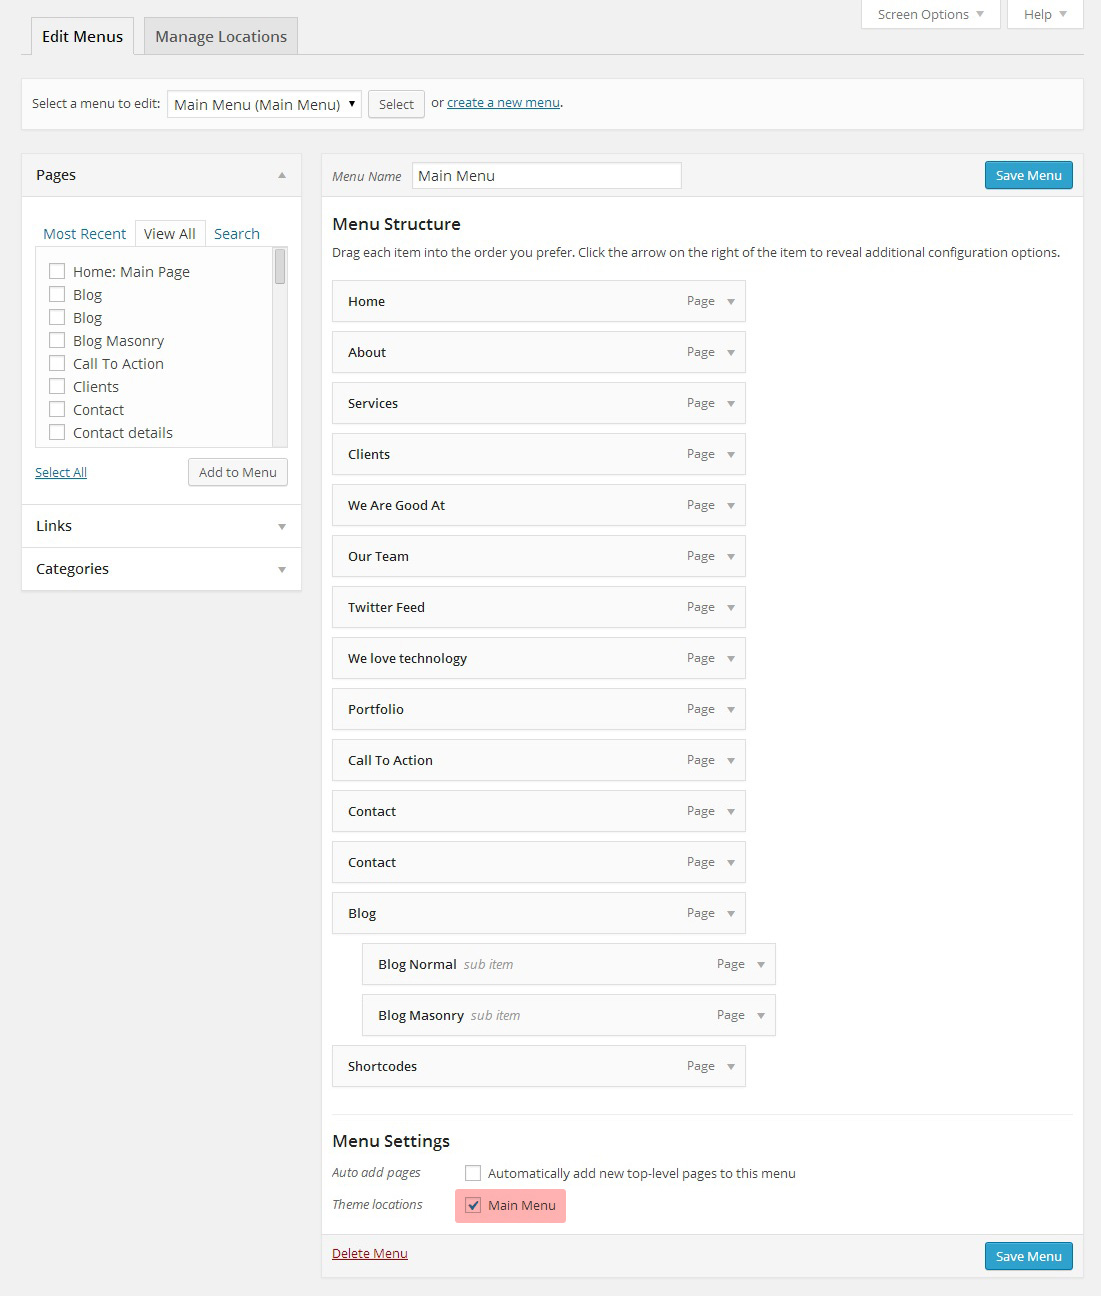
Go to Appearance » Menus, select Main Menu menu, check Main Menu under Theme locations and then press
It's important to set the main menu since it dictates the order of sections in the one pager.
Configuring Contact Form 7 plugin
Our theme requires contact form 7 plugin for contact form. After installing it, go to Contact » Add new (or edit current one) and in Form field paste what's below:
							[text* your-name watermark "Name"]
                            [email* your-email watermark "Email"]
                            [text* your-phone watermark "Phone"]


							[textarea* your-message watermark "Message"]

							 [submit "Send Message"]
Then at the top of page you'll see the shortcode, for example:
[contact-form-7 id="836" title="Contact form 1"]
There is a second layout of the contact form 7 we made available in our demos
[text* your-name watermark "Name"]
[email* your-email watermark "Email"]
[textarea* your-message watermark "Message"]
Post Types Order plugin
This plugin is useful for reordering home slides (Main Slider is a custom post type). Once the plugin is activated you will see a message at the top of the admin page.
Follow Settings Page link and press to save plugin's settings.
Configuring MailChimp for WordPress plugin
Our theme recommends installing MailChimp for WordPress for newsletter subscriptions. After installing it, go to MailChimp for WP - MailChimp Settings and paste your MailChimp API key and then press 'Save Changes'. If the key is valid, you will see 'Connected' at the top of the page.
To configure the newsletter form, go to MailChimp for WP - Forms and in 'Form mark-up' field paste what's below:
Make sure you selected the subscription list defined in your MailChimp account.
At the bottom of page you'll see the shortcode, for example:
[mc4wp_form]
You can add this shortcode inside a post, page or text widget
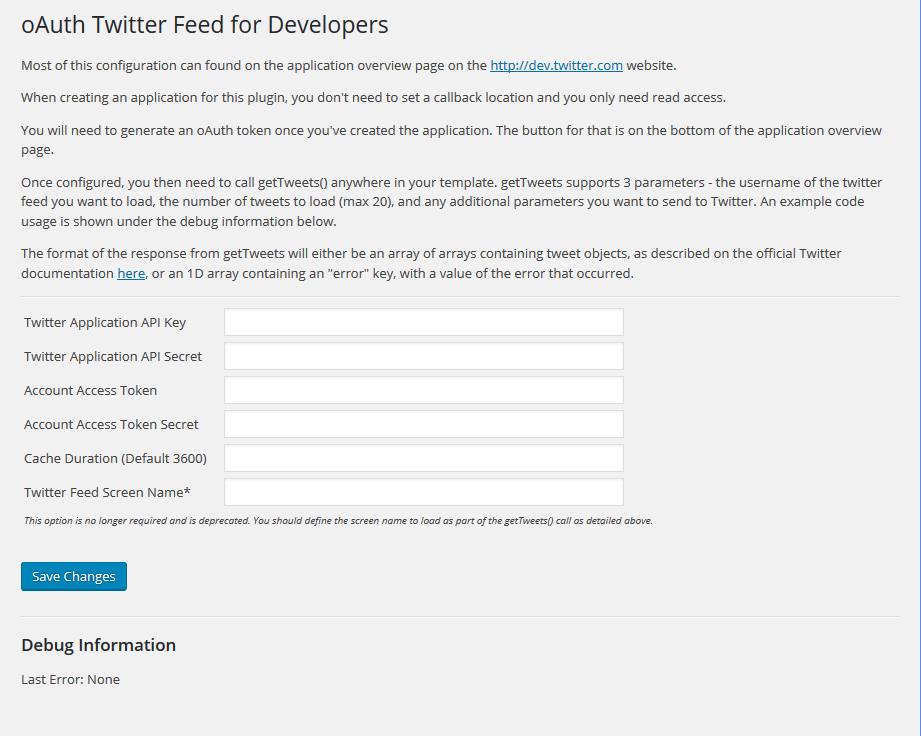
Configuring oAuth Twitter Feed for Developers plugin
Our theme requires this plugin for twitter shortcode. After installing it, go to Settings -- Twitter Feed Auth and fill in the following fields:
- Twitter Application Consumer Key
- Twitter Application Consumer Secret
- Account Access Token
- Account Access Token Secret
- Cache Duration (Default 3600) - optional. Period of time over the tweets are cached
To generate the twitter account access token, consumer secret and consumer key, you must create a twitter application on twitter developer website http://dev.twitter.com and follow the instructions there.
- Click on the "Create new application" button.
- Fill up the details inside the fields, Enter Captcha, Agree the terms and Click on Proceed.
- Now your application will be created. For now your provided with the "Consumer Key" and "Consumer Secret key"
- Scroll down to the bottom and click on "Create Access Token". Revisit the page after few mins and you can see that you’re now given with the "Access Token" and "Access Token Secret" keys.